To create an account in Facebook’s business manager, the following prerequisites must be met.
In order to utilize the Official WhatsApp API, it is necessary to have a personal Facebook account, followed by the creation of a business account linked to it. The objective of this guide is to clarify the initial step of this process, which involves creating an account in the business manager. If you have already completed this step, please proceed to the second guide, which outlines how to use the WhatsApp API.
By following the steps outlined below, you can create an account for your company and gain access to the Official WhatsApp API in the next step.
Prerequisites
– Have a personal Facebook account;
– To access the WhatsApp Cloud API through the business manager, it is mandatory to have a CNPJ. Without a CNPJ, it will not be possible to create an account.
To begin, you must access your account via the Facebook Business website instead of the regular website. Click on the provided link below to be directed to the appropriate site.
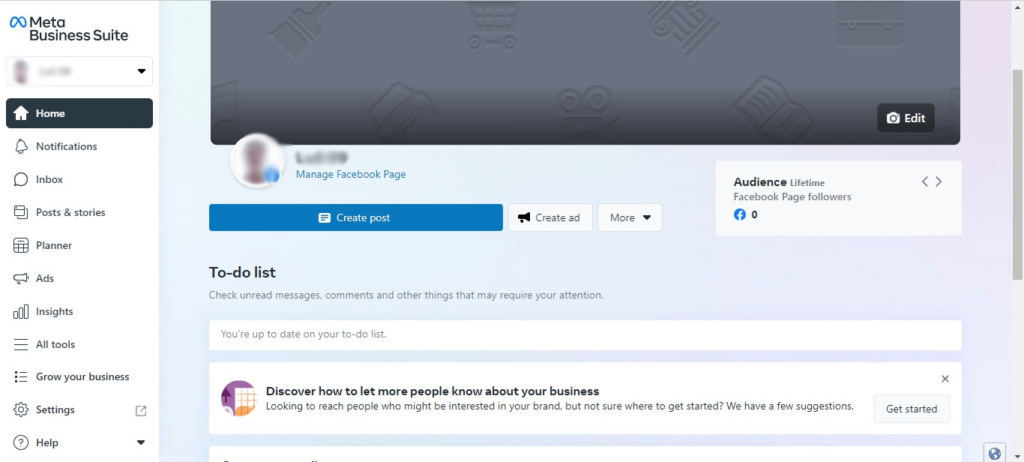
Once you have successfully logged in, you should be directed to the page displayed in the image below.
Facebook business website.
Step 2
Create a business account
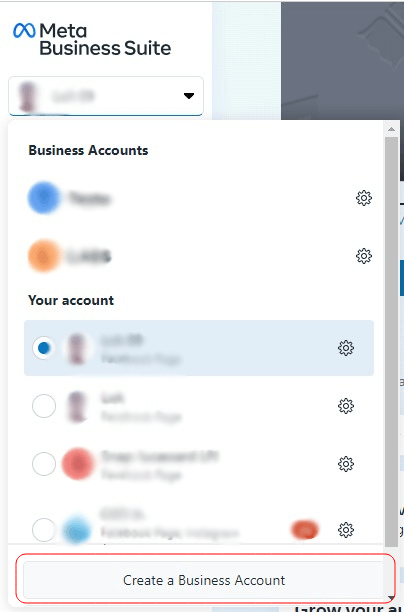
In this next step, you need to click on the upper left corner of the screen from the previous step. This action will display the screen shown in the image below. To create your account, simply click on the button labeled “Create a Business Account” located below.
Tab with your accounts on the Facebook business website.
Step 3
Fill in the data
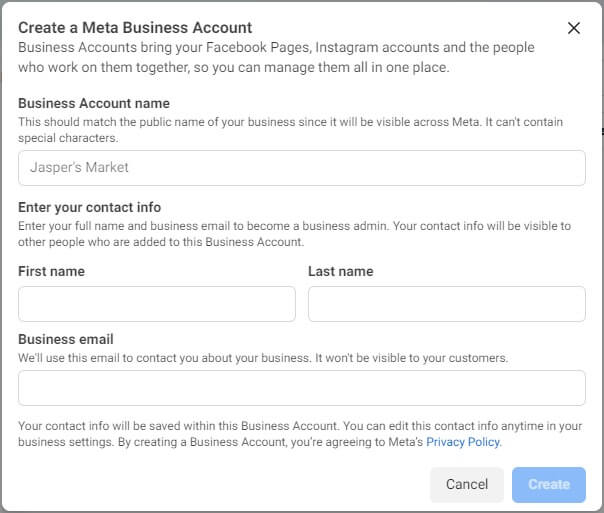
Once you have clicked on the button from the previous step, a form will appear on your screen. You are required to fill in the “Business Account name” field with the name of your company and provide the requested information in the remaining fields.
Tip: It is recommended that you use your company’s trade name when filling in the “Business Account name” field.
Form to create a business account on Facebook.
New screens will appear as you advance through the form, and you should only fill in the information listed below if it pertains to your company’s specific scenario.
Claim
Facebook provides an option on this screen to link the newly created business account with other social networks. You are welcome to link it with any of your company’s social networks, if you choose to do so.
Add people
At this point, if you wish to add additional person(s) who can manage your business and the social networks you claimed in the previous step, you can do so by entering their email(s).
Confirm
Ensure that all the information, including the account manager(s), is accurate before proceeding. You may also add an image to the account in this step if desired.
Step 4
Complete the information
After you’ve created your account, you will be redirected to the screen shown below. To complete the account creation process correctly, simply click on the “Go to Business Settings” button located in the center of the screen.
Screen after creating the business account on Facebook.
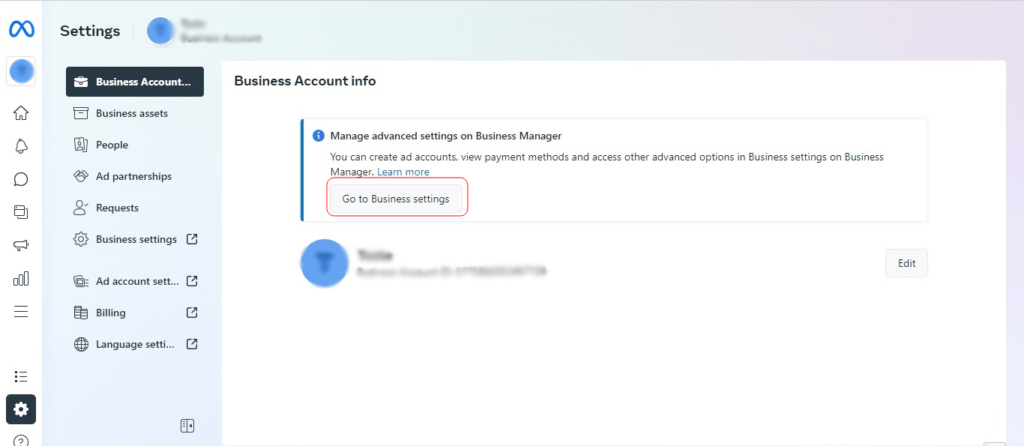
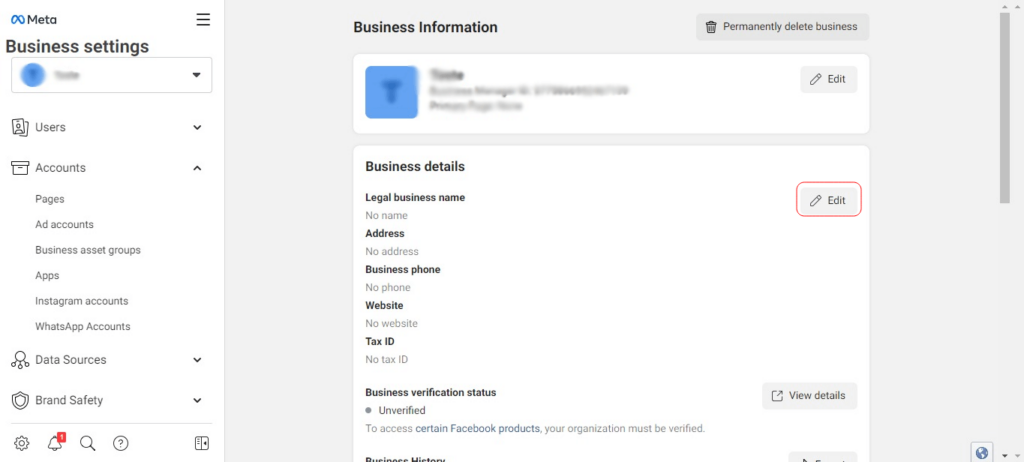
Once you’ve reached the business settings screen (as shown in the image below), navigate to the Company Information section and locate the Company Details area. Click on the “Edit” button within this section and proceed to provide any missing information, such as your address, website, and tax identification details.
Business settings in business account created on Facebook.
Conclusion
By following the aforementioned steps, you should have successfully established your company’s account on Facebook/Meta. You can now proceed to the second step, which entails creating an app that will allow you to access the WhatsApp Cloud API.
Meta is the parent company that owns both Facebook and WhatsApp. In order to ensure that your phone number is properly registered and considered your property, you should follow the aforementioned steps within your company account. This will help prevent any potential issues or blocks from occurring on WhatsApp.
If you have any uncertainties or concerns, please feel free to reach out to our support team for further assistance and information.
With all steps completed, click here to see the next tutorial.